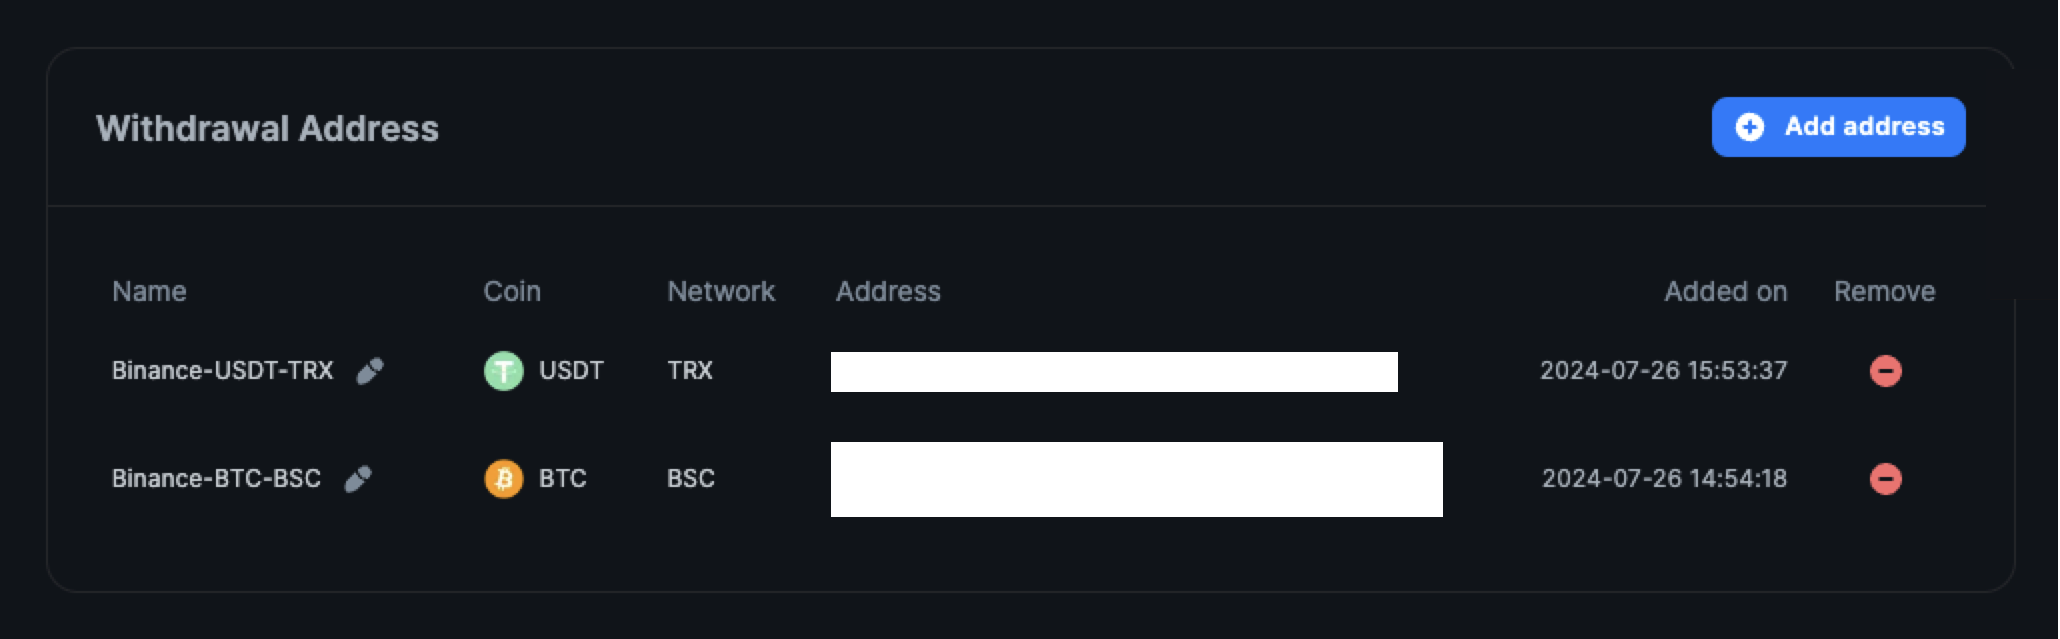
# Welcome to SmashFi

## This book is made to help SmashFi customers better understand SmashFi Service

> **SmashFi values trust the most.**
>
> **We believe trust comes from transparency.**
>
> #### So, we explain what, how, why our service works for you. <a href="#what-is-sandbank" id="what-is-sandbank"></a>

## What is SmashFi?

`"Revolutionizing the Crypto Landscape"`

SmashFi is a platform that simplifies Bitcoin investments by offering easy self-custody, reducing transaction fees, and providing automated trading tools, all designed to make Bitcoin management more accessible and secure for everyone.

## Our Vision

SmashFi paints a future without financial borders, fueled by cryptocurrency. We're paving the path for effortless crypto investments, empowering everyone to amplify their wealth through the boundless potential of digital assets.

## Core Offerings <a href="#core-offerings" id="core-offerings"></a>

#### Simplified Bitcoin Transfers with Lower Costs

SmashFi eliminates the complexity and high transaction costs typically associated with moving Bitcoin from local fiat-to-crypto (F2C) exchanges to personal wallets for self-custody. Our platform streamlines this process, reducing the number of steps and cutting transaction fees by up to 90%, making Bitcoin self-custody more accessible and affordable.

#### Automated Portfolio Growth

With SmashFi’s proprietary trading bot, users can automate the growth of their Bitcoin holdings, achieving an average monthly return of 7%. This tool helps users increase their Bitcoin holdings with minimal effort.

#### Secure and Flexible Asset Custody

SmashFi provides a multi-tiered storage solution by distributing your Bitcoin across partner exchange wallets, the SmashFi wallet, and a non-custodial third-party custodian. This diversified storage minimizes risks from exchange failures or hacks while offering the flexibility to adjust the distribution of your assets.

#### User-Friendly Recovery Options

For those new to self-custody, SmashFi offers a recovery-enabled, non-custodial wallet. Even if users lose their private keys, they can recover their assets through an encrypted backup stored with a trusted custodian, combining security with ease of use.

#### Cost-Effective and Integrated Platform

SmashFi stands out by offering an all-in-one platform that not only reduces transaction fees but also integrates secure storage, automated trading, and asset management, enhancing the overall user experience and investment efficiency.


# Sign up

At SmashFi, you can easily sign up using Google social login. You can also sign up using your email and password. This allows users to effortlessly manage their cryptocurrency portfolios and grow their crypto assets. SmashFi aims to provide users with an efficient and secure cryptocurrency investment management experience.


# Using Google account

**If you have a Google account, you can use SmashFi right away. You can proceed as follows:**

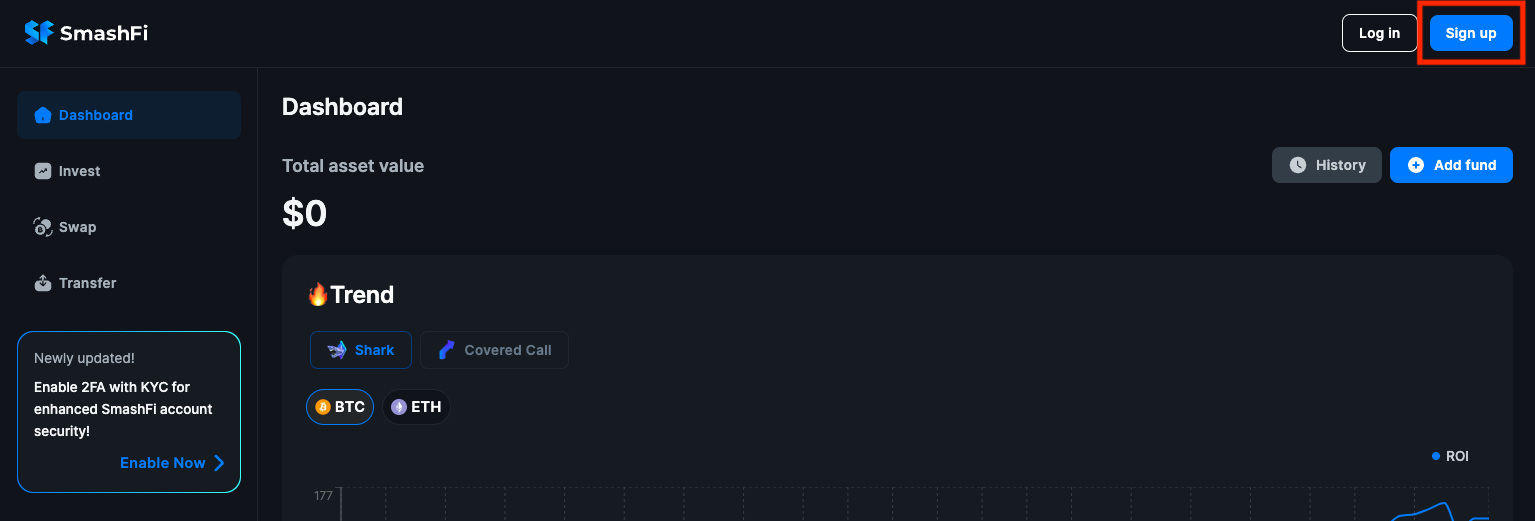
1. <https://smashfi.me> web page, click on `Sign up` in the upper right corner.

<figure><img src="https://2260387934-files.gitbook.io/~/files/v0/b/gitbook-x-prod.appspot.com/o/spaces%2FMxPfaVCLU0Czhjxw23iD%2Fuploads%2Fn0yxB1cAkTwmGr0c8STu%2F1-home-signup.png?alt=media&amp;token=e6afc6a7-00ac-4d99-bf23-6f36db614654" alt=""><figcaption></figcaption></figure>

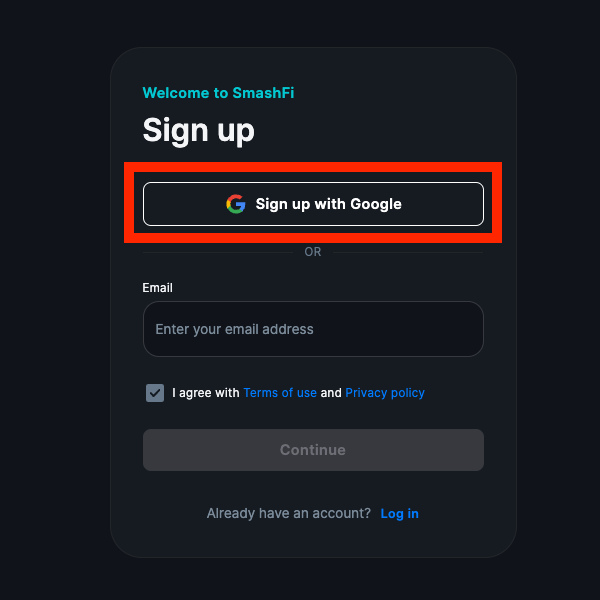
2. Click on `Sign up with Google`

<figure><img src="https://2260387934-files.gitbook.io/~/files/v0/b/gitbook-x-prod.appspot.com/o/spaces%2FMxPfaVCLU0Czhjxw23iD%2Fuploads%2FhzACqsB7oneGvgxRKJgU%2F2-a-sign%20up%20with%20google.png?alt=media&amp;token=d830d82b-e14c-4199-b779-74bfeded97d4" alt="" width="450"><figcaption></figcaption></figure>

3. Choose Google account you want to use for registration.

<figure><img src="https://2260387934-files.gitbook.io/~/files/v0/b/gitbook-x-prod.appspot.com/o/spaces%2FMxPfaVCLU0Czhjxw23iD%2Fuploads%2F9kXnQ6xIMbpLDrEvomWJ%2F2-b-google-choose%20acocunt.png?alt=media&amp;token=d62d1be3-b804-437b-b604-f7dbc85a407e" alt="" width="450"><figcaption></figcaption></figure>

4. Click on `Continue`

<figure><img src="https://2260387934-files.gitbook.io/~/files/v0/b/gitbook-x-prod.appspot.com/o/spaces%2FMxPfaVCLU0Czhjxw23iD%2Fuploads%2FPhW4QmE2p1k0Bqc4jawT%2FSing%20in%20to%20Smashfi-continue.png?alt=media&amp;token=3cb40a9e-ffea-4480-9b4d-75353c0c6c60" alt="" width="375"><figcaption></figcaption></figure>

That's it! The initial Google account linking and login have been completed without complex KYC information input. You can repeat the same process each time you use SmashFi in the future.


# Using Email address

**You can also register using your email address. You can proceed as follows:**

1. <https://smashfi.me> web page, click on `Sign up` in the upper right corner.

<figure><img src="https://2260387934-files.gitbook.io/~/files/v0/b/gitbook-x-prod.appspot.com/o/spaces%2FMxPfaVCLU0Czhjxw23iD%2Fuploads%2Fn0yxB1cAkTwmGr0c8STu%2F1-home-signup.png?alt=media&amp;token=e6afc6a7-00ac-4d99-bf23-6f36db614654" alt=""><figcaption></figcaption></figure>

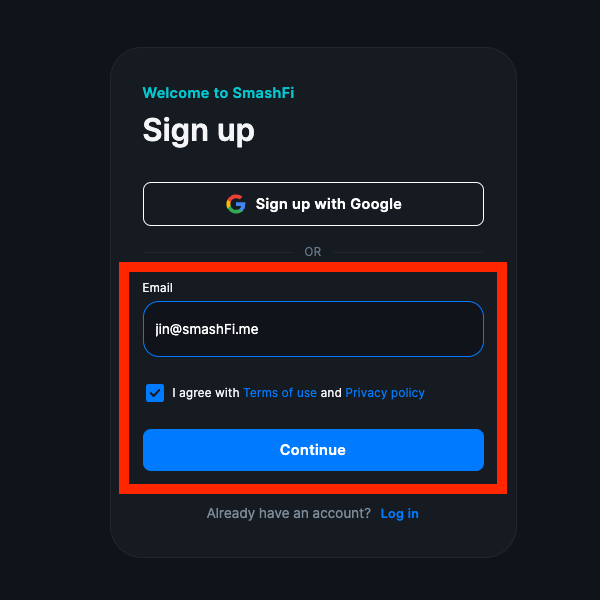
2. After entering your `email address`, check the box for "I agree with the Terms of Use and Privacy Policy," then click the `Continue` button.

<figure><img src="https://2260387934-files.gitbook.io/~/files/v0/b/gitbook-x-prod.appspot.com/o/spaces%2FMxPfaVCLU0Czhjxw23iD%2Fuploads%2Fp3RPu6HZPGz7P8RKtK07%2F3-a-sign%20up%20with%20email.png?alt=media&amp;token=2e7ebca8-33d3-4671-ad8c-47be5c803389" alt="" width="450"><figcaption></figcaption></figure>

3. Enter the `4-digit code` sent to your email to verify your email address.

<figure><img src="https://2260387934-files.gitbook.io/~/files/v0/b/gitbook-x-prod.appspot.com/o/spaces%2FMxPfaVCLU0Czhjxw23iD%2Fuploads%2FNmmmMDnZPGPKq5ys2liM%2F%E1%84%89%E1%85%B3%E1%84%8F%E1%85%B3%E1%84%85%E1%85%B5%E1%86%AB%E1%84%89%E1%85%A3%E1%86%BA%202024-08-06%2013.04.58.png?alt=media&amp;token=345bf85f-c4f4-41b0-8645-0c6b39f06c0c" alt="" width="450"><figcaption></figcaption></figure>

4. Enter the password again and click the `Continue` button to complete the process.

<figure><img src="https://2260387934-files.gitbook.io/~/files/v0/b/gitbook-x-prod.appspot.com/o/spaces%2FMxPfaVCLU0Czhjxw23iD%2Fuploads%2F0gWe68knTUVug89uvXtA%2F%E1%84%89%E1%85%B3%E1%84%8F%E1%85%B3%E1%84%85%E1%85%B5%E1%86%AB%E1%84%89%E1%85%A3%E1%86%BA%202024-08-06%2013.06.13.png?alt=media&amp;token=b724c0be-1a05-460b-a71e-a9456c602639" alt="" width="450"><figcaption></figcaption></figure>

That's it! The initial registration and login have been completed without complex KYC information input. You can use your email address and password to log in each time you use SmashFi in the future.


# Log in

At SmashFi, you can easily log in using Google social login. You can also log in using your email and password.


# Using Google account

**If you registered with your Google account, you can log in using your Google account.**

1. <https://smashfi.me> web page, click on `Log in` in the upper right corner.

<figure><img src="https://2260387934-files.gitbook.io/~/files/v0/b/gitbook-x-prod.appspot.com/o/spaces%2FMxPfaVCLU0Czhjxw23iD%2Fuploads%2FVKP7OS7jxL9gq0DrFIaN%2F1-home-login.png?alt=media&amp;token=cc912fcb-cd7c-4c86-9e4e-1d72e3af43fc" alt=""><figcaption></figcaption></figure>

2. Click on `Log in with Google`

<figure><img src="https://2260387934-files.gitbook.io/~/files/v0/b/gitbook-x-prod.appspot.com/o/spaces%2FMxPfaVCLU0Czhjxw23iD%2Fuploads%2FUehgZ61UDH78wFjUB3BG%2F%E1%84%89%E1%85%B3%E1%84%8F%E1%85%B3%E1%84%85%E1%85%B5%E1%86%AB%E1%84%89%E1%85%A3%E1%86%BA%202024-08-19%2016.47.15.png?alt=media&amp;token=1e33c550-94f6-495c-8035-f1a493769cd0" alt="" width="375"><figcaption></figcaption></figure>

3. Choose the Google account you previously registered with SmashFi.

<figure><img src="https://2260387934-files.gitbook.io/~/files/v0/b/gitbook-x-prod.appspot.com/o/spaces%2FMxPfaVCLU0Czhjxw23iD%2Fuploads%2F9kXnQ6xIMbpLDrEvomWJ%2F2-b-google-choose%20acocunt.png?alt=media&amp;token=d62d1be3-b804-437b-b604-f7dbc85a407e" alt="" width="450"><figcaption></figcaption></figure>


# Using Email address

**If you signed up with your email address and password, you can log in with that information.**

1. <https://smashfi.me> web page, click on `Log in` in the upper right corner.

<figure><img src="https://2260387934-files.gitbook.io/~/files/v0/b/gitbook-x-prod.appspot.com/o/spaces%2FMxPfaVCLU0Czhjxw23iD%2Fuploads%2FVKP7OS7jxL9gq0DrFIaN%2F1-home-login.png?alt=media&amp;token=cc912fcb-cd7c-4c86-9e4e-1d72e3af43fc" alt=""><figcaption></figcaption></figure>

2. Enter the email and password you registered with.

<figure><img src="https://2260387934-files.gitbook.io/~/files/v0/b/gitbook-x-prod.appspot.com/o/spaces%2FMxPfaVCLU0Czhjxw23iD%2Fuploads%2FFUW50riv6JhHj1E2Ev5r%2F%E1%84%89%E1%85%B3%E1%84%8F%E1%85%B3%E1%84%85%E1%85%B5%E1%86%AB%E1%84%89%E1%85%A3%E1%86%BA%202024-08-19%2016.48.18.png?alt=media&amp;token=87deebf7-38e7-4799-8258-dd150afe8f69" alt="" width="375"><figcaption></figcaption></figure>

<figure><img src="https://2260387934-files.gitbook.io/~/files/v0/b/gitbook-x-prod.appspot.com/o/spaces%2FMxPfaVCLU0Czhjxw23iD%2Fuploads%2FKsWDrVbZrSDBDNSvgdt3%2F%E1%84%89%E1%85%B3%E1%84%8F%E1%85%B3%E1%84%85%E1%85%B5%E1%86%AB%E1%84%89%E1%85%A3%E1%86%BA%202024-08-19%2016.49.36.png?alt=media&amp;token=02461031-b079-4115-ac98-543a18727e54" alt="" width="375"><figcaption></figcaption></figure>

3. **`Optional`**\
   If you have previously registered for `Two-Factor Authentication(2FA)`, you may need to complete this step to log in. We strongly recommend setting up 2FA as it significantly enhances your security.

* We support two methods for 2FA
  * Using an Authenticator App (used after entering your password)
  * Using a Passkey (used instead of a password)

<figure><img src="https://2260387934-files.gitbook.io/~/files/v0/b/gitbook-x-prod.appspot.com/o/spaces%2FMxPfaVCLU0Czhjxw23iD%2Fuploads%2FbCLp4VYinY8ETDtZ7QiN%2F%E1%84%89%E1%85%B3%E1%84%8F%E1%85%B3%E1%84%85%E1%85%B5%E1%86%AB%E1%84%89%E1%85%A3%E1%86%BA%202024-08-12%2016.49.19.png?alt=media&amp;token=2fc60c92-5fc5-4356-af93-b2be3cca5a85" alt=""><figcaption></figcaption></figure>

* You can set up `Two-Factor Authentication(2FA)`after logging in and completing KYC (Know Your Customer) verification.&#x20;
  * [Check how to complete KYC verification](/my-profile)
  * [Check how to set up 2FA](/my-profile/set-up-two-factor-authentication-2fa)


# Transfer funds

{% hint style="info" %}
**Deposits and withdrawals on&#x20;**<mark style="color:orange;">**Binance**</mark>**&#x20;are fee-free!**

When you deposit/withdraw to **Binance**, there is no network fee regardless of which network you choose. This is because the deposit and withdrawal between Binance and SmashFi use an off-chain transfer method. The differences between networks mainly affect the minimum withdrawal amount.
{% endhint %}

* To withdraw on SmashFi, you need to [`whitelist the withdrawal address.`](/transfer-funds/withdrawal-address-whitelisting) This is to enhance security by ensuring that withdrawals can only be made to addresses you have specifically registered. To complete the whitelisting process, [`2FA must be enabled.`](/my-profile/set-up-two-factor-authentication-2fa)
* The minimum/maximum deposit and withdrawal quantity standards for each coin follow the policies of each exchange.


# Deposit

{% hint style="info" %}
**Deposits and withdrawals on&#x20;**<mark style="color:orange;">**Binance**</mark>**&#x20;are fee-free!**

When you deposit/withdraw to **Binance**, there is no network fee regardless of which network you choose. This is because the deposit and withdrawal between Binance and SmashFi use an internal transfer method. The differences between networks mainly affect the minimum withdrawal amount.
{% endhint %}

1. Click `Transfer` page on the left navigation bar
2. If this is your first deposit on SmashFi, click the `Create Account` button.

<figure><img src="https://2260387934-files.gitbook.io/~/files/v0/b/gitbook-x-prod.appspot.com/o/spaces%2FMxPfaVCLU0Czhjxw23iD%2Fuploads%2FZtSX2CO8QsnYkDJYPSGK%2F%E1%84%89%E1%85%B3%E1%84%8F%E1%85%B3%E1%84%85%E1%85%B5%E1%86%AB%E1%84%89%E1%85%A3%E1%86%BA%202024-08-07%2012.56.04.png?alt=media&amp;token=891468c3-5e01-4ea6-ad6f-364d805d488c" alt="" width="563"><figcaption></figcaption></figure>

3. Choose which `crypto(Coin)` you want to deposit.
   1. Once you select the coin and network for your deposit, the deposit address will appear.
   2. Copy this and paste the address into the withdrawal destination.

<figure><img src="https://2260387934-files.gitbook.io/~/files/v0/b/gitbook-x-prod.appspot.com/o/spaces%2FMxPfaVCLU0Czhjxw23iD%2Fuploads%2FqgrO8T3JpJzYUEFxKwMI%2F%E1%84%89%E1%85%B3%E1%84%8F%E1%85%B3%E1%84%85%E1%85%B5%E1%86%AB%E1%84%89%E1%85%A3%E1%86%BA%202024-08-07%2012.57.42.png?alt=media&amp;token=611922e5-cb13-4002-86f3-48a1c03f1ab2" alt="" width="563"><figcaption></figcaption></figure>


# Withdraw

## Intro

We have introduced the `withdrawal address whitelisting` process to provide an added layer of protection for your cryptocurrency assets.

#### **What This Means for You:**

To ensure the highest level of security, all users are now required to register their withdrawal addresses. Moving forward, withdrawals will only be permitted to these registered addresses. This can be any address you choose, such as your most frequently used exchange wallet or a private wallet address.

**How to Register Your Withdrawal Address:**

1. Enable 2FA: Register SmashFi with an Authenticator app and enable two-factor authentication (2FA). This is necessary for the registration process.
2. Complete KYC: To enable 2FA, you must first complete the Know Your Customer (KYC) process. This process is powered by Onfido, a trusted KYC solution used by industry leaders like Binance and OKX. The KYC process is straightforward and typically takes less than 1-2 minutes if you have the necessary documents ready.
3. Register Withdrawal Address: Once 2FA is enabled, you can easily register your withdrawal addresses using the 6-digit code generated by your Authenticator app.

* If this is your first withdrawal on SmashFi, you need to whitelist the withdrawal wallet address to enhance security. [How to whitelist a withdrawal wallet address](/transfer-funds/withdrawal-address-whitelisting)

## How to withdraw

1. Click `Transfer` page on the left navigation bar.
2. In `Withdrawal`, choose which crypto you want to withdraw.

<figure><img src="https://2260387934-files.gitbook.io/~/files/v0/b/gitbook-x-prod.appspot.com/o/spaces%2FMxPfaVCLU0Czhjxw23iD%2Fuploads%2F4uARvgCEw2nia6F6yPpX%2F%E1%84%89%E1%85%B3%E1%84%8F%E1%85%B3%E1%84%85%E1%85%B5%E1%86%AB%E1%84%89%E1%85%A3%E1%86%BA%202024-08-07%2016.31.02.png?alt=media&amp;token=721cb4f0-600f-4df8-ba37-f61cf9d41c4c" alt="" width="563"><figcaption></figcaption></figure>

3. Choose which `address` you want to withdraw to.

<figure><img src="https://2260387934-files.gitbook.io/~/files/v0/b/gitbook-x-prod.appspot.com/o/spaces%2FMxPfaVCLU0Czhjxw23iD%2Fuploads%2FyBeAjmePjtlzPwn5z53H%2Fmy%20address.png?alt=media&amp;token=eee62808-2470-4eb4-a518-998982dfae33" alt="" width="563"><figcaption></figcaption></figure>

{% hint style="info" %}
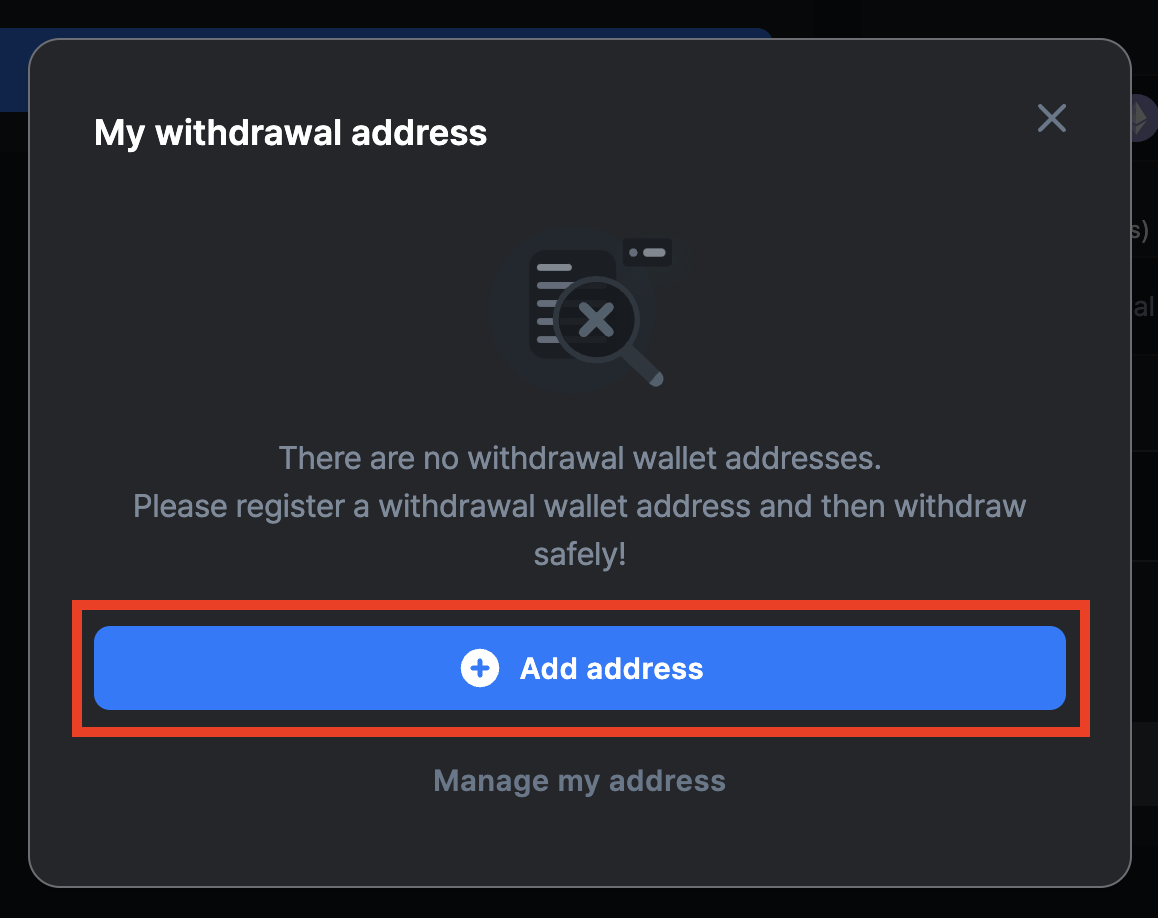
If there are no addresses registered with your withdrawal wallet, please click '**add address**' to add a wallet address. This will be whitelisted.

**You can find detailed instructions for adding an address** [**here.**](/transfer-funds/withdrawal-address-whitelisting)
{% endhint %}

4. Enter the amount that you want to withdraw and click `Withdraw.`

<figure><img src="https://2260387934-files.gitbook.io/~/files/v0/b/gitbook-x-prod.appspot.com/o/spaces%2FMxPfaVCLU0Czhjxw23iD%2Fuploads%2F4PInNbLyxQJo0laGpVBL%2Fwithdraw-1.png?alt=media&amp;token=779f3001-a353-4349-8f83-f3c33b20bafa" alt="" width="563"><figcaption></figcaption></figure>

5. Please double-check the `withdrawal address`, `network`, and `amount`. If you really want to proceed, send a code to your email and enter it, then input the 6-digit code from your authenticator app, and finally, click the withdraw button.

<figure><img src="https://2260387934-files.gitbook.io/~/files/v0/b/gitbook-x-prod.appspot.com/o/spaces%2FMxPfaVCLU0Czhjxw23iD%2Fuploads%2FPOvSRUAgzXktYqsXzUUZ%2Fwithdraw-2.png?alt=media&amp;token=b4719504-da1d-43ee-ad27-c4015c9c4970" alt="" width="563"><figcaption></figcaption></figure>

{% hint style="info" %}
**Deposits and withdrawals on&#x20;**<mark style="color:orange;">**Binance**</mark>**&#x20;are fee-free!**

When you deposit/withdraw to **Binance**, there is no network fee regardless of which network you choose. This is because the deposit and withdrawal between Binance and SmashFi use an off-chain transfer method. The differences between networks mainly affect the minimum withdrawal amount.
{% endhint %}

6. You will receive a notification via email once the withdrawal is complete.
7. By scrolling down the screen, you can view your current `balance` and `transaction history` in detail.

<figure><img src="https://2260387934-files.gitbook.io/~/files/v0/b/gitbook-x-prod.appspot.com/o/spaces%2FMxPfaVCLU0Czhjxw23iD%2Fuploads%2FsRgrKd1otE66ZpReo3pd%2F%E1%84%89%E1%85%B3%E1%84%8F%E1%85%B3%E1%84%85%E1%85%B5%E1%86%AB%E1%84%89%E1%85%A3%E1%86%BA%202024-08-07%2016.50.02.png?alt=media&amp;token=19f9ec5b-281b-4aa5-8982-29815590964c" alt="" width="563"><figcaption></figcaption></figure>

## **Withdrawal restrictions:**

{% hint style="warning" %}
12-hour limit after enabling 2FA.
{% endhint %}


# Withdrawal address whitelisting

To withdraw on SmashFi, you need to `whitelist the withdrawal address.` This is to enhance security by ensuring that withdrawals can only be made to addresses you have specifically registered.&#x20;

{% hint style="success" %}

* To complete the whitelisting process, [`2FA must be enabled.`](/my-profile/set-up-two-factor-authentication-2fa)
* To complete the 2FA process, <mark style="color:blue;">`KYC verification must be completed.`</mark>
  {% endhint %}

***

**There are two paths to register your withdrawal wallet address. You can choose the route that is most convenient for you:**

1. Go to **Transfer > Withdraw > My Withdrawal Address > Add Address**
2. Alternatively, go to the upper right corner, click on the **User Icon > My Profile > Withdrawal Address > Add Address**

## Route 1. **Transfer > Withdraw > My Withdrawal Address > Add Address**

1. Click `Transfer` page on the left navigation bar.
2. In `Withdrawal`, choose `crypto` and click `withdraw to(address)`&#x20;

<figure><img src="https://2260387934-files.gitbook.io/~/files/v0/b/gitbook-x-prod.appspot.com/o/spaces%2FMxPfaVCLU0Czhjxw23iD%2Fuploads%2FPJFmhvk41bCeqa5J4BX5%2Faddress1.png?alt=media&amp;token=c7d29854-0fff-460a-aa51-c6e0cd6936fc" alt="" width="563"><figcaption></figcaption></figure>

3. Click `Add address.`

<figure><img src="https://2260387934-files.gitbook.io/~/files/v0/b/gitbook-x-prod.appspot.com/o/spaces%2FMxPfaVCLU0Czhjxw23iD%2Fuploads%2F8g5FLBwChBQr8Gjz7qbh%2Fadd%20address-1.png?alt=media&amp;token=6f41d435-652d-47ef-86e0-8b52dfe8fe41" alt="" width="563"><figcaption></figcaption></figure>

4. Please enter the name of the withdrawal address (optional and can be changed), coin, network, and withdrawal wallet address, then click `Add Address.`

<figure><img src="https://2260387934-files.gitbook.io/~/files/v0/b/gitbook-x-prod.appspot.com/o/spaces%2FMxPfaVCLU0Czhjxw23iD%2Fuploads%2F4KluCg9hciTCwnXtipoO%2Fadd%20address-2.png?alt=media&amp;token=391c2a67-bf26-4f80-a292-cbe19796c2f5" alt="" width="563"><figcaption></figcaption></figure>

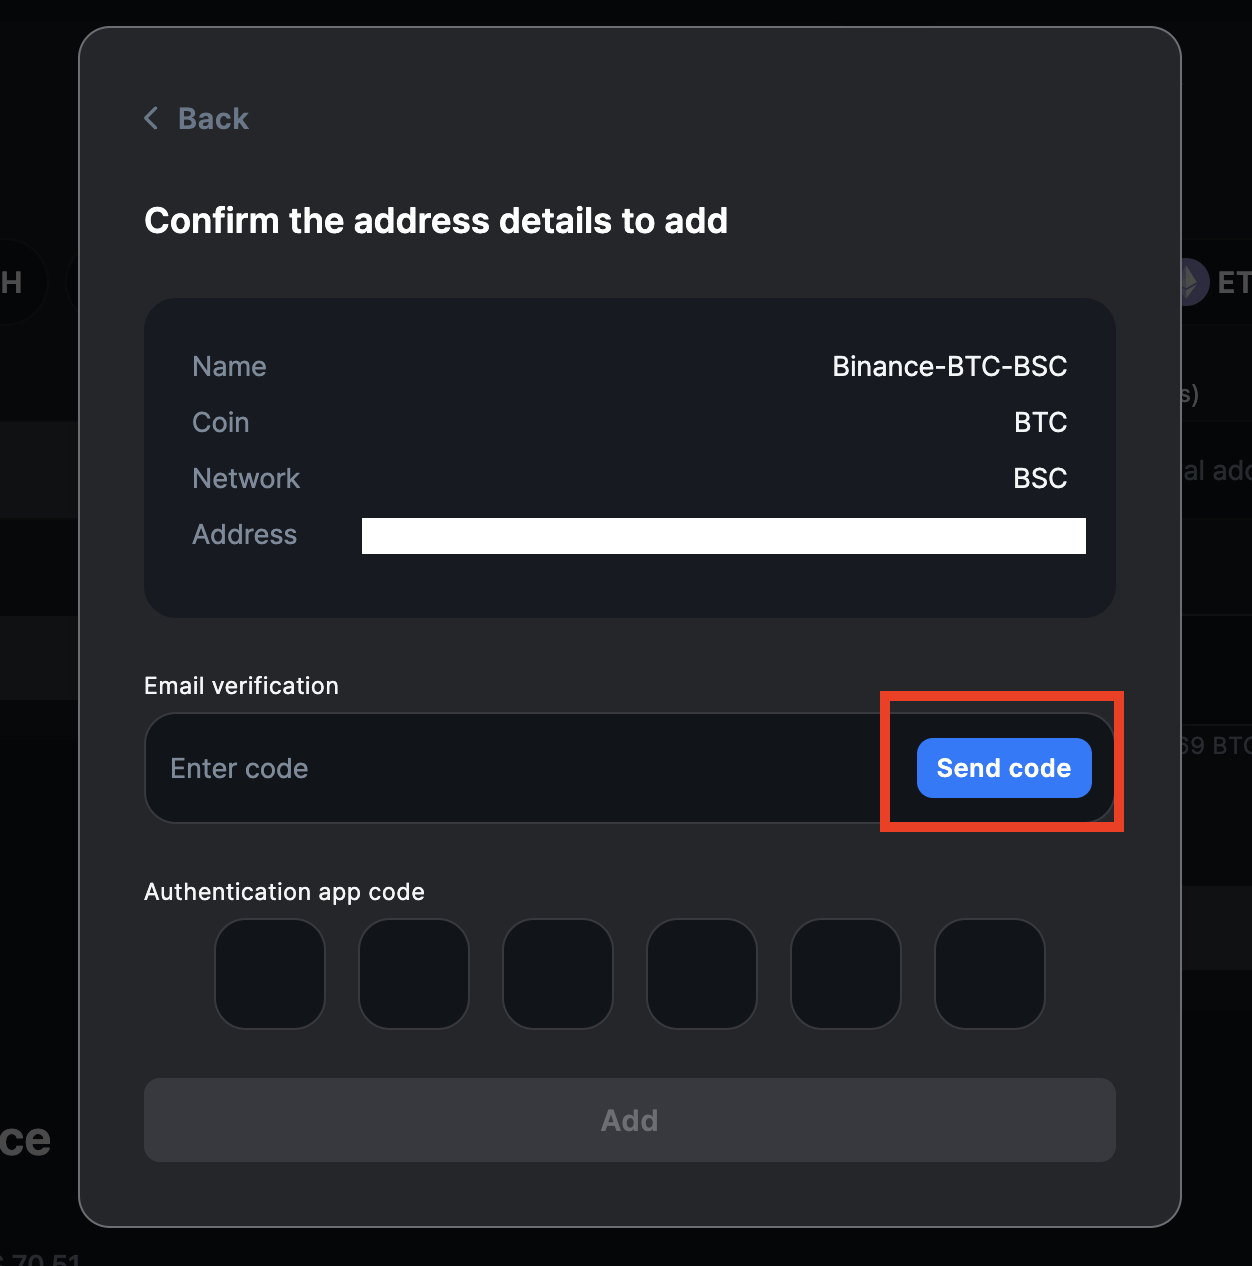
5. Please double-check the name of the withdrawal address (optional and can be changed), coin, network, and withdrawal wallet address. If you really want to proceed, send a code to your email and enter it, then input the 6-digit code from your authenticator app, and finally, click the `Add button.`

<figure><img src="https://2260387934-files.gitbook.io/~/files/v0/b/gitbook-x-prod.appspot.com/o/spaces%2FMxPfaVCLU0Czhjxw23iD%2Fuploads%2FNkMjZy4JGrHkOL00fgV1%2Fadd%20address-3.png?alt=media&amp;token=79c12984-b837-4f46-9a98-a0eddcda1bd8" alt="" width="563"><figcaption></figcaption></figure>

6. Registration is complete!
7. If you want to remove your withdrawal wallet address, you can do so by clicking `Manage My Address`

<figure><img src="https://2260387934-files.gitbook.io/~/files/v0/b/gitbook-x-prod.appspot.com/o/spaces%2FMxPfaVCLU0Czhjxw23iD%2Fuploads%2FSqLfobs5MhSOFs6QfuFX%2Fadd%20address-5.png?alt=media&amp;token=350b4a1e-77a0-495e-946e-93fabbe79427" alt="" width="563"><figcaption></figcaption></figure>

## Route 2. **User Icon > My Profile > Withdrawal Address > Add Address**

1. When you log in, a user icon will appear in the upper right corner. Click on the `user icon` and then click on `My Profile.`

<figure><img src="https://2260387934-files.gitbook.io/~/files/v0/b/gitbook-x-prod.appspot.com/o/spaces%2FMxPfaVCLU0Czhjxw23iD%2Fuploads%2FX23Y8UFRB499bSbxksav%2F%E1%84%89%E1%85%B3%E1%84%8F%E1%85%B3%E1%84%85%E1%85%B5%E1%86%AB%E1%84%89%E1%85%A3%E1%86%BA%202024-08-07%2017.37.06.png?alt=media&amp;token=a22508c6-1a0c-4bde-9dff-71222388480e" alt="" width="375"><figcaption></figcaption></figure>

2. Scroll down and click `Add Address` to the right of Withdrawal Address.

<figure><img src="https://2260387934-files.gitbook.io/~/files/v0/b/gitbook-x-prod.appspot.com/o/spaces%2FMxPfaVCLU0Czhjxw23iD%2Fuploads%2FNqd2UZ1tJINF3Z3Biqe0%2Fwithdrawal%20addresses-3.png?alt=media&amp;token=e6454ff3-1af9-48d4-bff7-336e202e9ba2" alt="" width="563"><figcaption></figcaption></figure>

* To complete the whitelisting process, [`2FA must be enabled.`](/my-profile/set-up-two-factor-authentication-2fa)
* To complete the 2FA process, [<mark style="color:blue;">`KYC verification must be completed.`</mark>](broken://pages/sjsVcRkcn7DBEhJzvarR)

3. Please enter the name of the withdrawal address (optional and can be changed), coin, network, and withdrawal wallet address, then click `Add Address.`

<figure><img src="https://2260387934-files.gitbook.io/~/files/v0/b/gitbook-x-prod.appspot.com/o/spaces%2FMxPfaVCLU0Czhjxw23iD%2Fuploads%2F4KluCg9hciTCwnXtipoO%2Fadd%20address-2.png?alt=media&amp;token=391c2a67-bf26-4f80-a292-cbe19796c2f5" alt="" width="563"><figcaption></figcaption></figure>

4. Please double-check the name of the withdrawal address (optional and can be changed), coin, network, and withdrawal wallet address. If you really want to proceed, send a code to your email and enter it, then input the 6-digit code from your authenticator app, and finally, click the `Add button.`

<figure><img src="https://2260387934-files.gitbook.io/~/files/v0/b/gitbook-x-prod.appspot.com/o/spaces%2FMxPfaVCLU0Czhjxw23iD%2Fuploads%2FNkMjZy4JGrHkOL00fgV1%2Fadd%20address-3.png?alt=media&amp;token=79c12984-b837-4f46-9a98-a0eddcda1bd8" alt="" width="563"><figcaption></figcaption></figure>

5. Registration is complete!
6. You can delete or modify registered withdrawal addresses. \
   For detailed instructions, please check [here.](/my-profile/manage-withdrawal-address)


# Auto-buy

The Auto-Buy feature allows you to automate your Bitcoin purchases with USDT. You can set up automatic purchases based on your preferred schedule or price drops to help you weather market volatility and accumulate Bitcoin with confidence.

### Two Purchase methods

#### 1. **Low-Price Buying**

* Price drop based: Automatically buy when the price drops by a certain percentage
* Set the drop percentage: You can set the drop percentage from 1-20% from the current Bitcoin price
* Auto execution: The system will automatically execute the buy order when the set drop percentage is reached

#### 2. Regular Buying

Set time intervals: Schedule Bitcoin purchases at fixed intervals Buy frequency option:

* Hourly: can be set from 1-24 hours
* Weekly: select a specific day (e.g. every Monday)
* Monthly: select a specific date

#### How it works:

* Set an overall budget and a one-time purchase denomination amount → execute an automatic purchase whenever the specified conditions are met.
* Subsequent purchases will reset the threshold to the last purchase price to continue buying.

#### Satoshi Rewards

Earn Satoshi points when executing Auto-Buys.

These points can be redeemed to cover off-chain withdrawal fees or for fee-free offers when sending Bitcoin to Custody Safe.

#### Fees

No fee for using SmashFi itself, 0.02% transaction fee charged to Binance per transaction

#### Condition of use

* SmashFi account signup and USDT deposit required.

#### Purchase and utilization

Purchased BTC can be held on the platform, invested in SmashFi's Shark fund, or withdrawn to an SmashFi custody wallet

####


# How to use Low-Price buying

This will automatically buy when the Bitcoin price drops a certain % from the current base.

#### Setup steps:

{% columns %}
{% column width="33.33333333333333%" %}

<figure><img src="https://2260387934-files.gitbook.io/~/files/v0/b/gitbook-x-prod.appspot.com/o/spaces%2FMxPfaVCLU0Czhjxw23iD%2Fuploads%2FOL7rhXr6VRK7kUoCqOZ8%2F%E1%84%89%E1%85%B3%E1%84%8F%E1%85%B3%E1%84%85%E1%85%B5%E1%86%AB%E1%84%89%E1%85%A3%E1%86%BA%202025-07-31%20%E1%84%8B%E1%85%A9%E1%84%92%E1%85%AE%205.14.58.png?alt=media&amp;token=4f117711-29bb-42b4-ae61-0ea7c95c1cb9" alt=""><figcaption></figcaption></figure>
{% endcolumn %}

{% column %}

1. **Start setting up Low-Price Buying** → Click *Set up Low-Price Buying*.
2. **Enter your total budget** → *How much USDT would you like to allocate for this plan?* → Enter the total amount of USDT you would like to use. → You can top up funds if needed by pressing `+Add funds`.
3. set buy condition: enter how much Bitcoin needs to drop to make a purchase\*\* → *How much does Bitcoin need to drop for you to make a purchase?* → You can only enter an integer between 1-20 (e.g. 5 → Buy when the price drops 5% from the current price)
4. **Accept Terms** → Check *I agree with Terms of Use and Auto-Buy Precautions*.
5. **Start your plan** → Click *Confirm and Activate*
   {% endcolumn %}
   {% endcolumns %}

{% columns %}
{% column width="33.33333333333333%" %}

<figure><img src="https://2260387934-files.gitbook.io/~/files/v0/b/gitbook-x-prod.appspot.com/o/spaces%2FMxPfaVCLU0Czhjxw23iD%2Fuploads%2FsZWY04uxxiyWS8MFdSv4%2F%E1%84%89%E1%85%B3%E1%84%8F%E1%85%B3%E1%84%85%E1%85%B5%E1%86%AB%E1%84%89%E1%85%A3%E1%86%BA%202025-07-31%20%E1%84%8B%E1%85%A9%E1%84%92%E1%85%AE%205.44.50.png?alt=media&amp;token=3f6f1705-d9c4-44a5-a70e-357b1980e9fc" alt=""><figcaption></figcaption></figure>
{% endcolumn %}

{% column %}

* **Advanced Options (Optional)** → *+Advanced (Optional)* Click on *+Advanced (Optional)* and you will see the following items.

  **✅ Automatically Update Benchmark Price** → This feature automatically updates the benchmark price to prevent you from missing out on buying opportunities when the price of Bitcoin increases. You can choose one of the two methods below:

  * **Update Based on Price** → If the price of Bitcoin goes up and becomes higher than the previous benchmark price, the benchmark price will automatically adjust to go up with it. Example: Initial threshold of 110,000 → When the market price reaches 115,000, reflect the new threshold.
  * **Update Based on Time** → Update the threshold to the latest market price every certain amount of time (e.g., 1 day, 1 week, etc.) to encourage more frequent buying
    {% endcolumn %}
    {% endcolumns %}


# How to use Regular buying

This is a time-based method of steadily buying Bitcoin. It will run automatically at regular intervals.

#### Setup steps:

{% columns %}
{% column width="33.33333333333333%" %}

<figure><img src="https://2260387934-files.gitbook.io/~/files/v0/b/gitbook-x-prod.appspot.com/o/spaces%2FMxPfaVCLU0Czhjxw23iD%2Fuploads%2FcCbdH005RodERJfknGqv%2F%E1%84%89%E1%85%B3%E1%84%8F%E1%85%B3%E1%84%85%E1%85%B5%E1%86%AB%E1%84%89%E1%85%A3%E1%86%BA%202025-07-31%20%E1%84%8B%E1%85%A9%E1%84%92%E1%85%AE%205.15.03.png?alt=media&amp;token=a4579fb4-f278-47c1-926a-2d50354bb63b" alt=""><figcaption></figcaption></figure>
{% endcolumn %}

{% column %}

1. Click the Set up **Regular Buy** button.
2. Enter your total budget&#x20;
   1. “How much USDT would you like to allocate for this plan?” \
      → Enter the total amount you want to spend and top up USDT with +Add funds if needed.
3. Enter the amount for a single purchase&#x20;
   1. “How much USDT would you like to spend per buy?” \
      → Set the amount of USDT to spend per purchase.
4. Set the frequency of your purchases
   1. “How often would you like to buy?” \
      → Choose one of the following

      Hourly / Weekly / Monthly
5. Agree to Terms
   1. Check the box for I agree with Terms of Use and Auto-Buy Precautions.
6. Confirm and start
   1. Click the Confirm and Activate button to start your subscription.
      {% endcolumn %}
      {% endcolumns %}


# Plan Detail Page Guide

## 1. Home screen: My Auto-Buy Plan

This page is a screen where you can check and manage the settings and execution history of the Auto-Buy plan you created at a glance.

<figure><img src="https://2260387934-files.gitbook.io/~/files/v0/b/gitbook-x-prod.appspot.com/o/spaces%2FMxPfaVCLU0Czhjxw23iD%2Fuploads%2F8bp168kDfGHtT2ttF8rs%2Fhome-autobuy.png?alt=media&amp;token=feee4fea-0e98-437d-86c8-ac8a20645f0e" alt=""><figcaption><p>Home screen > My Auto-Buy Plan</p></figcaption></figure>

### 1. Plan List

Each plan includes the following details:

<table data-full-width="false"><thead><tr><th width="232.46484375">Section</th><th>Description</th></tr></thead><tbody><tr><td>Status</td><td><ul><li>Indicates wheter the plan is currently <code>working</code> or <code>stopped</code>.</li></ul></td></tr><tr><td>Product</td><td>The name and condition of the plan.<br>Example:<br>- <code>Regular buying</code> : Buy 10 USDT every Wednesday at 11:00<br>- <code>Low-Price buying</code> :  Buy 10 USDT when Bitcoin drops by 15%.</td></tr><tr><td>Purchased BTC/Paid USDT</td><td>Total Bitcoin purchased and total USDT spent so far.</td></tr><tr><td>PnL</td><td>Current profit/loss and return percentage</td></tr><tr><td>Remaining USDT</td><td>Unused USDT balance allocated to the plan.</td></tr><tr><td>Detail button ( > )</td><td>Opens the detailed view of the selected plan.</td></tr></tbody></table>

<br>

### 2. Analysis / Ended plan

* Analysis: View performance and stats for all your plans.
* Ended plan: See the list of ended plans.

### 3. Set new plan button

* Click to create a new auto-buy plan.

## 2. Plan Detail Page

### 1. Low-Price Buying

This screen provides a detailed view of Low-Price Auto-Buy plan.

You can monitor the status, manage your budget, check profits, and take actions like moving funds or investing further.

<figure><img src="https://2260387934-files.gitbook.io/~/files/v0/b/gitbook-x-prod.appspot.com/o/spaces%2FMxPfaVCLU0Czhjxw23iD%2Fuploads%2F6dy8pFBPh3l39PNaGHul%2F%E1%84%89%E1%85%B3%E1%84%8F%E1%85%B3%E1%84%85%E1%85%B5%E1%86%AB%E1%84%89%E1%85%A3%E1%86%BA%202025-07-31%20%E1%84%8B%E1%85%A9%E1%84%92%E1%85%AE%205.16.13.png?alt=media&amp;token=c204eaee-138b-46c6-8ac6-31e8dc3f0d1f" alt=""><figcaption></figcaption></figure>

### 2. Regular Buying

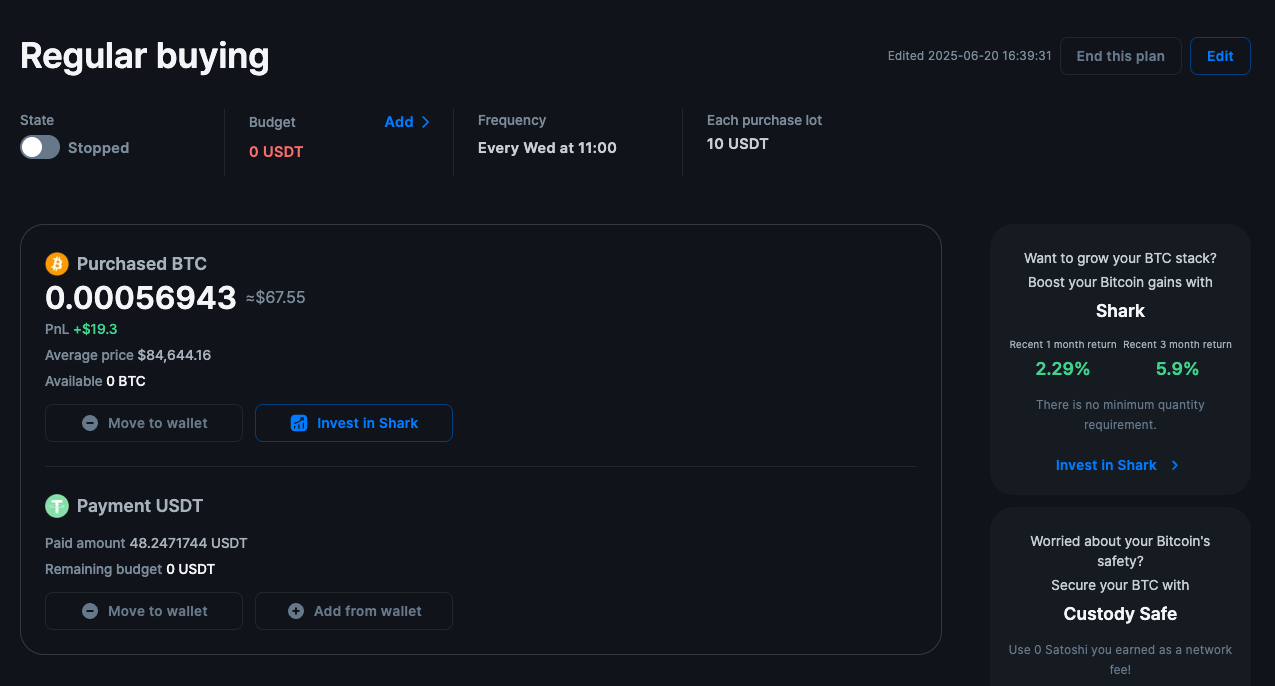
This screen helps you track and manage your Regular Buying strategy. Here's what each section means and how you can use it:

<figure><img src="https://2260387934-files.gitbook.io/~/files/v0/b/gitbook-x-prod.appspot.com/o/spaces%2FMxPfaVCLU0Czhjxw23iD%2Fuploads%2FwGM8dHPlTgTbsG3wqpLW%2F%E1%84%89%E1%85%B3%E1%84%8F%E1%85%B3%E1%84%85%E1%85%B5%E1%86%AB%E1%84%89%E1%85%A3%E1%86%BA%202025-07-31%20%E1%84%8B%E1%85%A9%E1%84%92%E1%85%AE%205.16.08.png?alt=media&amp;token=c43aebd2-b73b-4b5e-a199-f619ac3e8d25" alt=""><figcaption></figcaption></figure>

### 3. Details

#### 1. Top section : Plan Overview

<table><thead><tr><th width="140.4609375">Field</th><th>Description</th></tr></thead><tbody><tr><td>State (Plan on/off switch)</td><td><ul><li>This toggle lets you pause or resume your auto-buy plan.</li><li>When turned on, the system will keep buying Bitcoin at the schedule you've set.</li><li>When set to <code>Stopped</code>, no buys will occur — but your BTC and USDT stay safely held.</li><li><mark style="color:$success;">Use this if you want to temporarily pause buying without deleting your plan.</mark></li></ul></td></tr><tr><td>Budget</td><td><ul><li>This is total amount of USDT you've allocated to this plan.</li><li>If the budget runs out, no further purchased will be made.</li><li>You can click <code>Add</code> to top it up anytime.</li><li><mark style="color:$success;">Keep an eye on this to make sure. your plan has enough funds to continue.</mark></li></ul></td></tr><tr><td>Trigger price</td><td><ul><li>The condition that triggers an auto-buy. </li><li>Example: -15% drop from current price.</li></ul></td></tr><tr><td>Frequency</td><td><ul><li>Tells you how often the system will buy Bitcoin.</li><li>Example: <code>Every Wed at 11:00</code></li><li>This is part of your Dollar-Cost Averaging(DCA) strategy— buying regularly, regardless of market price.</li><li><mark style="color:$success;">Great for long-term investors who want to avoid timing the market.</mark></li></ul></td></tr><tr><td>Each Purchase Lot</td><td><ul><li>Shows how much USDT will be used per transaction.</li><li>Example: If this is 10 USDT, then every Wednesday the system will use 10USDT to buy BTC(as long as your budget allows).</li></ul></td></tr><tr><td>Edit / End this plan</td><td>Options to update or end the current plan</td></tr><tr><td>Edited date</td><td>Shows the last time this plan was edited.</td></tr></tbody></table>

#### 2. Purchased BTC

* Bitcoin You Own Through This Plan
* Displays the total amount of BTC you've accumulated from this plan.
  * Value: Current market Value of your BTC
  * PnL (Profit & Loss):
    * This shows how your BTC has performed since it was purchased. It compares your average buy price to hourly market price, updated regularly.
* If it's green and positive, your BTC is currently worth more than what you paid.

<table><thead><tr><th width="149.78125">Info</th><th>Description</th></tr></thead><tbody><tr><td>Purchased BTC</td><td>Total Bitcoin acquired through this plan and its current value.</td></tr><tr><td>PnL</td><td>This shows how much your purchased Bitcoin's value has changed based on the latest hourly closing price compared to your average purchase price.</td></tr><tr><td>Average price</td><td>The average price per BTC for your purchases.</td></tr><tr><td>Available</td><td>Amount of BTC that hasn't yet been moved or invested.</td></tr><tr><td>Actions</td><td><ul><li><code>Move to wallet</code> :  Move purchased BTC to your SamshFi wallet.</li><li><code>Invest  in Shark</code> : Move purchased BTC to the Shark fund for yield boosting.</li></ul></td></tr></tbody></table>

#### 3. Payment USDT

| Info             | Description                                                                                                                                                                                     |
| ---------------- | ----------------------------------------------------------------------------------------------------------------------------------------------------------------------------------------------- |
| Paid amount      | Total USDT spent through this plan.                                                                                                                                                             |
| Remaining budget | Unused amount of the plan's budget.                                                                                                                                                             |
| Actions          | <ul><li><code>Move to wallet</code> :  Move unused USDT back to your SmashFi wallet.</li><li><code>Add from wallet</code> : Allocate more USDT from your SmashFi wallet to this plan.</li></ul> |

#### 4. Purchased History

<figure><img src="https://2260387934-files.gitbook.io/~/files/v0/b/gitbook-x-prod.appspot.com/o/spaces%2FMxPfaVCLU0Czhjxw23iD%2Fuploads%2FqIF7lHhrDdsYdtiKG4kp%2F%E1%84%89%E1%85%B3%E1%84%8F%E1%85%B3%E1%84%85%E1%85%B5%E1%86%AB%E1%84%89%E1%85%A3%E1%86%BA%202025-07-31%20%E1%84%8B%E1%85%A9%E1%84%92%E1%85%AE%205.17.33.png?alt=media&amp;token=fed3fd0f-30ec-48da-a299-fc9ff045a125" alt=""><figcaption></figcaption></figure>

This table shows **every completed buy** under this plan:

* When the purchase happened
* How much BTC you got
* At what price
* And how much USDT was used

It helps you review your DCA strategy and track how consistently your plan has run.


# Analysis

You can easily check the progress of the auto-buying plan you set up and visually analyze the cumulative performance and the performance of your buying strategy.

<figure><img src="https://2260387934-files.gitbook.io/~/files/v0/b/gitbook-x-prod.appspot.com/o/spaces%2FMxPfaVCLU0Czhjxw23iD%2Fuploads%2FVXrGBDKD96rLgr9NUsKu%2Fautobuy%20analysis.png?alt=media&amp;token=f7a47229-3062-4cfd-822b-954179f41508" alt=""><figcaption></figcaption></figure>

### 1. Summary Metrics at the top

* Purchased BTC: The total amount of BTC you've purchased so far in your recurring plan
* Paid USDT: Cumulative Tether (USDT) spent on this plan
* Profit/Loss in USD: Amount of profit or loss based on the current price and percentage of profit (%)
* Avg. Price: Average unit price of Bitcoin purchased so far
* Purchase Count: Total number of executions

→  With this information, users can quickly see how their investments are doing so far.

### 2. Chart Area

* Orange line: actual market price of Bitcoin&#x20;
* Orange dot: the date the actual purchase was made and the price at the time (BTC Price)&#x20;
* Blue dotted line: user's cumulative average purchase price (Dollar-cost average)&#x20;

→ You can visually understand how your automated buying strategy is actually performing compared to the market price.

### 3. Filter options

* Select a time period : view only purchases made during a specific time period
* Chart Type: Daily[^1] / Weekly&#x20;
* Plan Status: Categorized as Working / Ended / Stopped
* Plan Type: Low Buy / Regular Buy
* Plan ID

→  Flexible filters to analyze your investment strategy from different perspectives

### 4. Purchase History

Detailed information about each purchase execution:

* Plan ID&#x20;
* Transaction time&#x20;
* Paid (USDT)&#x20;
* Purchased (BTC)&#x20;
* Executed (BTC)&#x20;
* Price (BTC price at the time)

→ All purchase history is transparent and easy to manage history

### 5. For more information

Even if the plan is ended, you can still check the past history on the analysis screen.

If you have set up multiple plans, the analysis by plan and overall analysis are provided separately

[^1]:


# How to get Satoshi with Auto-Buy

**Earn SATS while stacking Bitcoin automatically.**

SmashFi rewards you with **Satoshis (SATS)** — the smallest unit of Bitcoin — when you consistently invest using Auto-Buy.\
It’s our way of helping you grow your stack while staying committed to your Bitcoin strategy.

## What is Satoshi reward?

Satoshi rewards are bonuses you earn by completing specific missions while using SmashFi services. They are given in SATS (Satoshis), the smallest unit of Bitcoin.

## When and how do I earn Satoshi?

You can currently earn Satoshi rewards by using Auto-Buy, SmashFi’s automated Bitcoin purchase feature.\
Rewards are given when specific conditions are met through either:<br>

* Regular Buying – Recurring purchases on a fixed schedule
* Low-Price Buying – Purchases triggered by Bitcoin price drops

More ways to earn Satoshi rewards will be added as new features are launched.

## Reward Conditions:&#x20;

### Low-Price Buying:&#x20;

Auto-Buy is triggered when the Bitcoin price drops by a preset percentage.

* 1%–5% drop: Earn 5 SATS
* 6%–10% drop: Earn 10 SATS
* 11%–20% drop: Earn 20 SATS
* Note: If multiple purchases are triggered within the same hour, they count as one event for reward calculation.

### Regular Buying:&#x20;

Auto-Buy runs on a fixed schedule (e.g. daily, weekly, or monthly).

* Earn 5 SATS for every 3 consecutive purchases in the same plan
* You must complete 3 purchases within a 90-day period to earn a reward
* If it takes longer than 90 days to complete 3 purchases, no reward is given

## General Rules

* Rewards are calculated separately for each Auto-Buy plan
* All rewards from active plans are added together to your total Satoshi rewards

## When can I use Satoshi rewards?

Satoshi rewards can currently be used to cover Bitcoin withdrawal fees when transferring Bitcoin from SmashFi to Custody Safe — SmashFi’s non-custodial smartphone wallet.

Custody Safe makes Bitcoin self-custody easy and secure.

To support your self-custody journey, SmashFi lets you use your earned SATS to reduce withdrawal fees when moving Bitcoin to your own wallet.

The more SATS you earn, the less you pay in fees when taking full control of your Bitcoin.\
More ways to use Satoshi rewards are coming soon.


# Boost Funds(Investment)

SmashFi offers a variety of investment products based on market-appropriate strategies. While there are differences between products, investments can be made with BTC, ETH. This page explains how to apply for and redeem investments.

* There is no limit to the minimum/maximum investment quantity for a product.


# Requst Investment

1. Click `Invest` page on the left navigation bar click.
2. After reviewing the investment product details, please click the `Start Investment` button.

   The 'Start Investment' button will appear only after you have logged in.

<figure><img src="https://2260387934-files.gitbook.io/~/files/v0/b/gitbook-x-prod.appspot.com/o/spaces%2FMxPfaVCLU0Czhjxw23iD%2Fuploads%2FDmL5zyR1F1Edz2MnPaNp%2Finvest.png?alt=media&amp;token=bb749a46-e95b-4d98-9fb3-9bcc0658192f" alt=""><figcaption></figcaption></figure>

3. Select `coin, investment amount and` Click `Continue`

<figure><img src="https://2260387934-files.gitbook.io/~/files/v0/b/gitbook-x-prod.appspot.com/o/spaces%2FMxPfaVCLU0Czhjxw23iD%2Fuploads%2FgYype3CSwSUuoiMD0FAO%2F%E1%84%89%E1%85%B3%E1%84%8F%E1%85%B3%E1%84%85%E1%85%B5%E1%86%AB%E1%84%89%E1%85%A3%E1%86%BA%202024-08-12%2016.19.25.png?alt=media&amp;token=db362c86-a6f3-48aa-bb03-c6b8ae36be27" alt="" width="442"><figcaption></figcaption></figure>

4. Review the investment details and terms, `check` the box to confirm your agreement, then tap `Confirm` to complete your investment.

<div><figure><img src="https://2260387934-files.gitbook.io/~/files/v0/b/gitbook-x-prod.appspot.com/o/spaces%2FMxPfaVCLU0Czhjxw23iD%2Fuploads%2FPnuqvMt968sc07X1vsss%2F%E1%84%89%E1%85%B3%E1%84%8F%E1%85%B3%E1%84%85%E1%85%B5%E1%86%AB%E1%84%89%E1%85%A3%E1%86%BA%202026-07-23%20%E1%84%8B%E1%85%A9%E1%84%92%E1%85%AE%204.32.28.png?alt=media&amp;token=97429cb9-bdc6-4956-bd0b-abe291bbedb6" alt=""><figcaption></figcaption></figure> <figure><img src="https://2260387934-files.gitbook.io/~/files/v0/b/gitbook-x-prod.appspot.com/o/spaces%2FMxPfaVCLU0Czhjxw23iD%2Fuploads%2FFg6BidexK5FiXNWtB4q3%2F%E1%84%89%E1%85%B3%E1%84%8F%E1%85%B3%E1%84%85%E1%85%B5%E1%86%AB%E1%84%89%E1%85%A3%E1%86%BA%202026-07-23%20%E1%84%8B%E1%85%A9%E1%84%92%E1%85%AE%204.34.40.png?alt=media&amp;token=b42c43ea-77f2-4818-9b0c-96cfc3553ade" alt=""><figcaption></figcaption></figure></div>

That's it. Enjoy premium quant strategy easily and make a profit.


# Redeem Investment

1. Select your investment product (ex. `Shark/BTC`)

<figure><img src="https://2260387934-files.gitbook.io/~/files/v0/b/gitbook-x-prod.appspot.com/o/spaces%2FMxPfaVCLU0Czhjxw23iD%2Fuploads%2Fl7upoU21OeetO0eYeSqx%2Fhome-my.png?alt=media&amp;token=567f38c7-678d-4f91-9886-b2ef917ef8ea" alt=""><figcaption></figcaption></figure>

2. Click `Redeem`

<figure><img src="https://2260387934-files.gitbook.io/~/files/v0/b/gitbook-x-prod.appspot.com/o/spaces%2FMxPfaVCLU0Czhjxw23iD%2Fuploads%2FCnUaZtwOhml9iYe4wxx4%2Finvest-my.png?alt=media&amp;token=b169b7bb-f8e6-4df5-9547-a5b964e1c723" alt=""><figcaption></figcaption></figure>

3. Read your details and click `Redeem`

<figure><img src="https://2260387934-files.gitbook.io/~/files/v0/b/gitbook-x-prod.appspot.com/o/spaces%2FMxPfaVCLU0Czhjxw23iD%2Fuploads%2Fy0dzW1CFVTztuu9RgQB2%2Fredeem-details.png?alt=media&amp;token=b4054300-b5c6-4535-baed-06e6bb625b62" alt="" width="375"><figcaption></figcaption></figure>

That's it. Enjoy premium quant strategy easily and make a profit.


# Custody Safe

## Secure, Fee‑Free Bitcoin Self‑Custody

*Move your Bitcoin from SmashFi to your own wallet — securely and fee-free.*

## 1. What Is Custody Safe?&#x20;

Custody Safe is SmashFi’s non‑custodial Bitcoin wallet powered by Multi-Party Computation (MPC) technology. It allows you to hold full control of your Bitcoin without seed phrases, and enables fee-free transfers from your SmashFi account under certain conditions.

## 2. Why Choose Custody Safe?

* **Own Your Bitcoin**\
  You retain your private keys – SmashFi does *not* custody your BTC, removing counterparty risk.
* **No Seed Phrases**\
  Access your wallet via a passphrase and a backup key; no mnemonic needed.
* **Zero-Fee Transfers**\
  Enjoy fee-free Bitcoin withdrawals when you move BTC purchased via Auto-Buy, Boost, or Swap. SmashFi covers these fees—and limits apply based on time period.\
  Transfers from external wallets may still incur standard network fees.
* **Easy Recovery & Backup**\
  If you lose your device, use your **Backup Key** to restore access—without compromising your security. SmashFi or Fireblocks *cannot* access your BTC.
* **Share Access with Trusted People**\
  Add multiple devices (phone, tablet, PC), or invite trusted family/friends to share wallet access (each has their own key share). Even in emergencies, your BTC stays recoverable.

## 3. How Custody Safe Works

* Built with 2-of-2 MPC technology: One key share on your device + one encrypted share on Fireblocks server → both required to sign transactions  → There is no single point of failure or custodial risk.&#x20;
* Off-chain signature scheme ensures no public exposure like multi-signature wallets.
* Transactions require both device and server signature → SmashFi/Fireblocks cannot move your BTC without your participation.


# How to Set Up and Use Custody Safe

### 1. **Download the SmashFi Custody Safe App** (iOS / Android).

<figure><img src="https://2260387934-files.gitbook.io/~/files/v0/b/gitbook-x-prod.appspot.com/o/spaces%2FMxPfaVCLU0Czhjxw23iD%2Fuploads%2FyOXPmj6hRzKsN6wKTilB%2Fcustody-download.png?alt=media&amp;token=cc423974-cf38-4b5c-a148-798425916cda" alt=""><figcaption></figcaption></figure>

### 2. **Log into your account on** [**smashfi.me**](https://smashfi.me/auth/login)  (web).

## (App ↓)

### 3. Upon launching the app, you’ll first be asked to set up security using biometrics or passcode. Then, you’ll be guided through creating and backing up your wallet step by step.

### 4. **Scan the QR code** displayed on the Custody Safe page to link your wallet.

<figure><img src="https://2260387934-files.gitbook.io/~/files/v0/b/gitbook-x-prod.appspot.com/o/spaces%2FMxPfaVCLU0Czhjxw23iD%2Fuploads%2FAPvdX80v6ESQSXr7ltHL%2Fcustody-button.png?alt=media&amp;token=da073edb-13a6-473d-a737-eb545a894143" alt=""><figcaption></figcaption></figure>

<div><figure><img src="https://2260387934-files.gitbook.io/~/files/v0/b/gitbook-x-prod.appspot.com/o/spaces%2FMxPfaVCLU0Czhjxw23iD%2Fuploads%2FifGmkjdRlnpiMDL6WDb8%2FscanQR.PNG?alt=media&amp;token=be0c384a-8580-4585-ab5d-4610ab400f0f" alt=""><figcaption></figcaption></figure> <figure><img src="https://2260387934-files.gitbook.io/~/files/v0/b/gitbook-x-prod.appspot.com/o/spaces%2FMxPfaVCLU0Czhjxw23iD%2Fuploads%2FgHVrLnrJrrF1Z9gr6G2V%2FScanQR-camera.PNG?alt=media&amp;token=6ed3f1f5-2301-4e97-945c-d1fdbf21f88f" alt=""><figcaption></figcaption></figure></div>

### 5. Follow the app instructions to complete setup step by step

* Private keys are generated securely on your device using MPC
* The app will guide you through creating your wallet and backing it up.

> <mark style="color:$danger;">**⚠️ Don’t forget to back up your wallet when prompted. It’s the only way to recover access if your device is lost.**</mark>

### **6.** Seamlessly transfer BTC earned through Auto-Buy, Boost, or Swap to Custody Safe — with zero blockchain fees (if eligible).

### 7. **To withdraw BTC later**: you can move Bitcoin from Custody Safe to any external wallet at any time.<br>


# Swap

SmashFi offers a swap function that allows you to freely exchange your coins for any coin through the swap function of each exchange. Swaps are processed instantly and there are no fees.

* The minimum/maximum swap quantity standards for each coin follow the policies of each exchange.

1. Click `Swap` page on the left navigation bar.
2. In `From`, choose `coin` and enter the `amount` you want to swap
3. In `Receive`, choose `coin` which you want to receive
4. Click `Calculate Swap Amount`

<figure><img src="https://2260387934-files.gitbook.io/~/files/v0/b/gitbook-x-prod.appspot.com/o/spaces%2FMxPfaVCLU0Czhjxw23iD%2Fuploads%2FSzsJm1HhCifv18ZIEm4B%2F%E1%84%89%E1%85%B3%E1%84%8F%E1%85%B3%E1%84%85%E1%85%B5%E1%86%AB%E1%84%89%E1%85%A3%E1%86%BA%202024-08-07%2018.56.28.png?alt=media&amp;token=2ecbacba-c5cc-4379-b1f4-6616bf6b2f8b" alt="" width="563"><figcaption></figcaption></figure>

5. Confirm all information and click `Swap` (The exchange rate is valid for 10 seconds, after which you can press refresh to load the new exchange rate)

<figure><img src="https://2260387934-files.gitbook.io/~/files/v0/b/gitbook-x-prod.appspot.com/o/spaces%2FMxPfaVCLU0Czhjxw23iD%2Fuploads%2F2ypnFEaTOgTYKvg8SMsA%2F%E1%84%89%E1%85%B3%E1%84%8F%E1%85%B3%E1%84%85%E1%85%B5%E1%86%AB%E1%84%89%E1%85%A3%E1%86%BA%202024-08-07%2018.55.02.png?alt=media&amp;token=0d63a7ec-a96a-4668-9cfd-deeebfaa22c8" alt="" width="563"><figcaption></figcaption></figure>


# My profile

In `My Profile,` you can edit or update the information and settings associated with your user account.&#x20;

This can include changing password, adjusting security settings, and managing your withdrawal wallet addresses..

* When you log in, a user icon will appear in the upper right corner. Click on the `user icon` and then click on `My Profile.`

<div align="left"><figure><img src="https://2260387934-files.gitbook.io/~/files/v0/b/gitbook-x-prod.appspot.com/o/spaces%2FMxPfaVCLU0Czhjxw23iD%2Fuploads%2FX23Y8UFRB499bSbxksav%2F%E1%84%89%E1%85%B3%E1%84%8F%E1%85%B3%E1%84%85%E1%85%B5%E1%86%AB%E1%84%89%E1%85%A3%E1%86%BA%202024-08-07%2017.37.06.png?alt=media&amp;token=a22508c6-1a0c-4bde-9dff-71222388480e" alt="" width="375"><figcaption></figcaption></figure></div>

<figure><img src="https://2260387934-files.gitbook.io/~/files/v0/b/gitbook-x-prod.appspot.com/o/spaces%2FMxPfaVCLU0Czhjxw23iD%2Fuploads%2FZGk67tXILf0CmcCDXPiv%2Fmy-full.png?alt=media&amp;token=870c885b-8339-48ef-8024-dfd8ac9530e4" alt=""><figcaption></figcaption></figure>


# About my profile

<figure><img src="https://2260387934-files.gitbook.io/~/files/v0/b/gitbook-x-prod.appspot.com/o/spaces%2FMxPfaVCLU0Czhjxw23iD%2Fuploads%2FJ8b5sxKPDme9A6iSfklZ%2Fmy-1.png?alt=media&amp;token=97b3cfc8-431e-456b-a5f7-d127de093c3d" alt=""><figcaption></figcaption></figure>

## Connect with Google

This feature allows users who signed up for SmashFi with their email and password to connect their account if their registered email is a Google email.&#x20;

By clicking the `'Connect with Google'`  and linking it to the same Google email used for their SmashFi account, users will be able to log in not only with their email and password but also with their Google account.

## Change password

This feature allows you to change your password.&#x20;

It is only available to users who signed up with an email and password, not those who registered with Google.&#x20;

To change your password, you must complete email verification and 2FA (if registered).

## Verify identity (KYC)

We are implementing a robust automated KYC (Know Your Customer) procedure provided by Onfido, a leading KYC solution trusted by industry giants like Binance.

The primary purpose of conducting KYC is to enable 2FA (2-Factor Authentication), adding an extra layer of security to your account.&#x20;

This process is powered by Onfido, a trusted KYC solution used by industry leaders like Binance and OKX. The KYC process is straightforward and typically takes less than 1-2 minutes if you have the necessary documents ready.

{% hint style="info" %}
For quick identity verification

* Enter your first name and last name as they appear on the **passport.**
* Select your passport as the document type.

Your identity will be verified within one minute.
{% endhint %}

## Referral

**Join the SmashFi Referral Program: Earn While You Empower**

By inviting your friends to invest in Shark using your unique referral code, you can earn a portion of the profit generated by their investments. The more friends you invite, the more you earn!

Example of Earnings:

* Your friend invests 10 BTC and earns a profit of 1 BTC.&#x20;
* SmashFi collects a 25% performance fee, which amounts to 0.25 BTC.&#x20;
* You receive 5% of this fee, which is 0.0125 BTC.&#x20;

Invest in Shark, refer your friends, and watch your income grow. For more details on how to create and share your referral code, visit [SmashFi Referral Program.](https://smashfi.me/promotion/referral-code)


# Set up Two-Factor Authentication (2FA)

We strongly encourage you to enable 2FA. We offer two methods to protect your valuable assets and information:

* **Using an Authenticator App**
* **Using a Passkey**

And we support 2FA in the following situations:

* **Login**
* **Withdrawal**
* **When attempting to change personal information**

This ensures that your assets remain secure at all times.

<figure><img src="https://2260387934-files.gitbook.io/~/files/v0/b/gitbook-x-prod.appspot.com/o/spaces%2FMxPfaVCLU0Czhjxw23iD%2Fuploads%2FAaWOjI6LLGllDRS8nYDd%2F2FA-b.png?alt=media&amp;token=40a323be-1d6e-4e87-b15c-872e1d37b399" alt=""><figcaption></figcaption></figure>

## 1. Authenticator App

* **How It Works**: You use an app (like Google Authenticator or Authy) to generate a time-based one-time password (TOTP) or a code. This code is used alongside your password to log in.
* **Features**:
  * **Dynamic Codes**: Generates a new code every 30 seconds, adding a time-based element to security.
  * **Offline Access**: Works without an internet connection once set up.
  * **Convenience**: Often integrated into mobile devices, making it easy to access codes.
  * **Secure**: Codes are generated locally on your device, reducing the risk of interception.

## 2. Passkey

* **How It Works**: Passkeys are cryptographic keys stored on your device and used for authentication. They provide a secure way to log in without entering a password.
* **Features**:
  * **Passwordless**: Eliminates the need for passwords, reducing the risk of password theft.
  * **Enhanced Security**: Uses strong cryptographic methods, making it more resistant to phishing and other attacks.
  * **Convenience**: Simplifies the login process by using biometric or device-based authentication (like Face ID or fingerprint recognition).
  * **Device-Specific**: Passkeys are typically stored and used on a specific device, adding an extra layer of security.

Each method offers a unique approach to enhancing security, with Authenticator apps relying on time-based codes and Passkeys leveraging cryptographic methods for a more seamless and secure login experience.

{% hint style="warning" %}
For your security, withdrawals are restricted for 12 hours after enabling a new Authenticator app or Passkey.
{% endhint %}


# Manage Withdrawal Address

For your security, we offer withdrawal address whitelisting.

The registered withdrawal address will be whitelisted for withdrawals, and you will always be able to withdraw only to this address.

<figure><img src="https://2260387934-files.gitbook.io/~/files/v0/b/gitbook-x-prod.appspot.com/o/spaces%2FMxPfaVCLU0Czhjxw23iD%2Fuploads%2FElnVVJxrCjxufsIwMPdj%2Fmy-3.png?alt=media&amp;token=820bb413-3f30-41d7-8c81-03d4e69d39fe" alt=""><figcaption></figcaption></figure>

In **My Profile > Withdrawal Address**, you can register, delete, and rename withdrawal addresses.

* For detailed instructions on adding an address, please check [here](/transfer-funds/withdrawal-address-whitelisting).